Drawing App using Vue
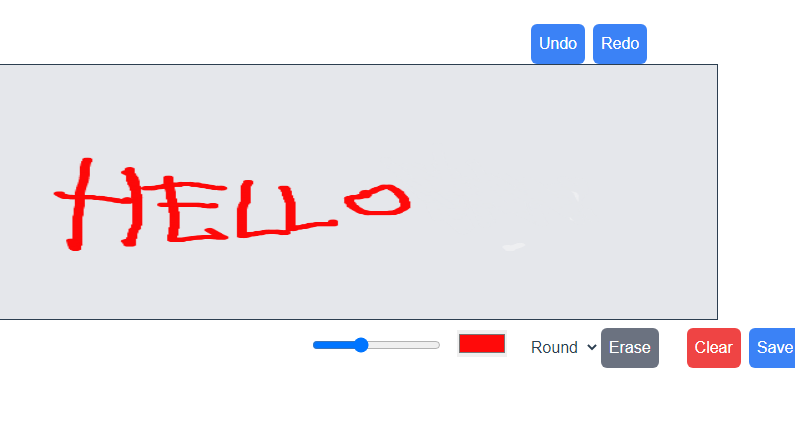
Are you looking to create a simple drawing app using Vue.js? Look no further! In this tutorial, we will be creating a basic drawing app using the HTML5 canvas element and Vue.js. The app will allow users to draw on the canvas using their mouse or touchscreen, change the color and size of the brush, and even save their drawing as an image.
First, let's start by setting up the canvas element in our template. We will be using the ref attribute to create a reference to the canvas element, which we will use later in our code to access the canvas' 2D rendering context.
<template>
  <div class="relative p-4">
    <canvas ref="canvas" width="640" height="480" style="border:1px solid"
     @mousedown="startDrawing" @mousemove="draw" @mouseup="stopDrawing"
     @touchstart="startDrawing" @touchmove="draw" @touchend="stopDrawing" class="bg-gray-200 w-3/5 h-64"></canvas>
  </div>
</template>
Next, we will create a mounted lifecycle hook in our Vue component's JavaScript code. This hook will be executed after the component has been added to the DOM, and we will use it to initialize the canvas' 2D rendering context and set some default values for our brush.
mounted() {
    this.context = this.$refs.canvas.getContext('2d')
    this.updateBrushSize()
    this.updateBrushType()
  },
Now that we have set up the canvas and initialized the 2D rendering context, we can start implementing the methods for drawing on the canvas. The startDrawing method is called when the user presses down on the canvas, and it sets the drawing data property to true so that we know the user is currently drawing. The draw method is called on mousemove and touchmove events, and it uses the canvas' 2D rendering context to draw a line between the last known coordinates of the mouse/finger and the current coordinates. Finally, the stopDrawing method is called when the user releases their mouse button or finger, and it sets the drawing data property to false so that we know the user has stopped drawing.
methods: {
    startDrawing(event) {
      this.drawing = true
      if (event.touches) {
    this.lastX = event.touches[0].clientX;
    this.lastY = event.touches[0].clientY;
  } else {
    this.lastX = event.clientX;
    this.lastY = event.clientY;
  }
    },
   draw(event) {
  if (!this.drawing) return
if (!event.touches) return
  this.context.beginPath()
  this.context.moveTo(this.lastX, this.lastY)
  const currentX = event.touches ? event.touches[0].clientX : event.clientX
  const currentY = event.touches ? event.touches[0].clientY : event.clientY
  this.context.lineTo(currentX, currentY)
  this.context.stroke()
  this.lastX = currentX
  this.lastY = currentY
},
This is the core of the drawing functionality. When the user is drawing, this method is called repeatedly to draw a line between the current position of the cursor and the last position of the cursor. The method starts by checking if the user is currently drawing, if not, it exits the function. Next, it creates a new path and sets the starting position to the lastX and lastY values. Then, it checks if the event is a touch event or a mouse event and sets the currentX and currentY accordingly. Finally, it calls the lineTo() and stroke() methods on the canvas context to draw a line between the last position and the current position, and updates the lastX and lastY values to the current position for the next time the function is called.
In the mounted() method, we have this code:
this.context = this.$refs.canvas.getContext('2d')
this.updateBrushSize()
this.updateBrushType()
Here, we are assigning the canvas context to the 'context' data property so that we can access it in other methods. Then, we call updateBrushSize() and updateBrushType() methods to set the brush size and type according to the user's preferences.
updateBrushSize() {
this.context.lineWidth = this.brushSize;
},
The updateBrushSize() method sets the brush size according to the value of the brushSize data property. We simply set the lineWidth property of the canvas context to the brushSize value.
updateBrushType() {
if (this.brushType === 'square') {
this.context.lineCap = 'butt';
} else {
this.context.lineCap = 'round';
}
},
The updateBrushType() method sets the brush type to either square or round. If the brushType data property is set to 'square', the lineCap property of the canvas context is set to 'butt', which creates square brush strokes. If it's set to 'round', the lineCap property is set to 'round', which creates round brush strokes.
saveImage() {
const link = document.createElement('a');
link.download = 'my-drawing.png';
link.href = this.$refs.canvas.toDataURL();
console.log(link)
link.click();
},
We will also add an undo and redo method. We will do this by pushing the each stroke into 2 arrays called undoStack and redoStack. Each time there is a mouse stroke (each mouse point) it will push them into these arrays.
Finally, we have the saveImage() method that allows the user to save their drawing as an image. It creates an 'a' element, sets the download attribute to 'my-drawing.png' and sets the href attribute to a Data URL of the canvas. It then triggers a click event on the link, which prompts the user to save the image to their device.
Our final code should look like this:
<template>
  <div class="relative p-4">
    <button v-if="undoStack.length > 0" @click="undo" class="ml-2 mt-2 p-2 bg-blue-500 text-white rounded-md">Undo</button>
    <button v-if="undoStack.length > 0" @click="redo" class="ml-2 mt-2 p-2 bg-blue-500 text-white rounded-md">Redo</button>
    <canvas
      ref="canvas"
      width="640"
      height="480"
      style="border: 1px solid;"
      @mousedown="startDrawing"
      @mousemove="draw"
      @mouseup="stopDrawing"
      @touchstart="startDrawing"
      @touchmove="draw"
      @touchend="stopDrawing"
      class="bg-gray-200 w-3/5 h-64"
    ></canvas>
    <input type="range" min="1" max="20" class="mr-2" v-model="brushSize" @change="updateBrushSize" />
    <input type="color" class="top-0 left-0 ml-2" v-model="color" @change="updateColor" />
    <select class="mt-2 ml-5" v-model="brushType" @change="updateBrushType">
      <option value="round">Round</option>
      <option value="square">Square</option>
    </select>
    <button @click="clear" class="ml-5 mr-2 mt-2 p-2 bg-red-500 text-white rounded-md">Clear</button>

    <button @click="saveImage" class="mt-2 mr-2 p-2 bg-blue-500 text-white rounded-md">Save Image</button>
  </div>
</template>

<script>
  export default {
    data() {
      return {
        drawing: false,
        context: null,
        lastX: 0,
        lastY: 0,
        color: "#000000",
        brushSize: 1,
        brushType: "round",
        undoStack: [],
        redoStack: [],
      };
    },
    mounted() {
      this.context = this.$refs.canvas.getContext("2d");
      this.updateBrushSize();
      this.updateBrushType();
    },
    methods: {
      startDrawing(event) {
        this.drawing = true;
        if (event.touches) {
          this.lastX = event.touches[0].clientX;
          this.lastY = event.touches[0].clientY;
        } else {
          this.lastX = event.clientX;
          this.lastY = event.clientY;
        }
      },
      draw(event) {
        if (!this.drawing) return;
        this.context.beginPath();
        this.context.moveTo(this.lastX, this.lastY);
        const currentX = event.touches ? event.touches[0].clientX : event.clientX;
        const currentY = event.touches ? event.touches[0].clientY : event.clientY;
        this.context.lineTo(currentX, currentY);
        this.context.stroke();
        this.lastX = currentX;
        this.lastY = currentY;
        this.undoStack.push(this.context.getImageData(0, 0, this.$refs.canvas.width, this.$refs.canvas.height));
        this.redoStack = [];
      },
      undo() {
        if (this.undoStack.length === 0) return;
        if (this.undoStack.length > 0) {
          this.redoStack.push(this.context.getImageData(0, 0, this.$refs.canvas.width, this.$refs.canvas.height));
          this.context.putImageData(this.undoStack.pop(), 0, 0);
        }
      },
      redo() {
        if (this.redoStack.length === 0) return;
        if (this.redoStack.length > 0) {
          this.undoStack.push(this.context.getImageData(0, 0, this.$refs.canvas.width, this.$refs.canvas.height));
          this.context.putImageData(this.redoStack.pop(), 0, 0);
        }
      },
      stopDrawing() {
        this.drawing = false;
      },
      clear() {
        this.context.clearRect(0, 0, this.$refs.canvas.width, this.$refs.canvas.height);
      },
      updateColor() {
        this.context.strokeStyle = this.color;
      },
      updateBrushSize() {
        this.context.lineWidth = this.brushSize;
      },
      updateBrushType() {
        if (this.brushType === "square") {
          this.context.lineCap = "butt";
        } else {
          this.context.lineCap = "round";
        }
      },
    },
    saveImage() {
      const link = document.createElement("a");
      link.download = "my-drawing.png";
      link.href = this.$refs.canvas.toDataURL();
      console.log(link);
      link.click();
    },
  };
</script>
Output: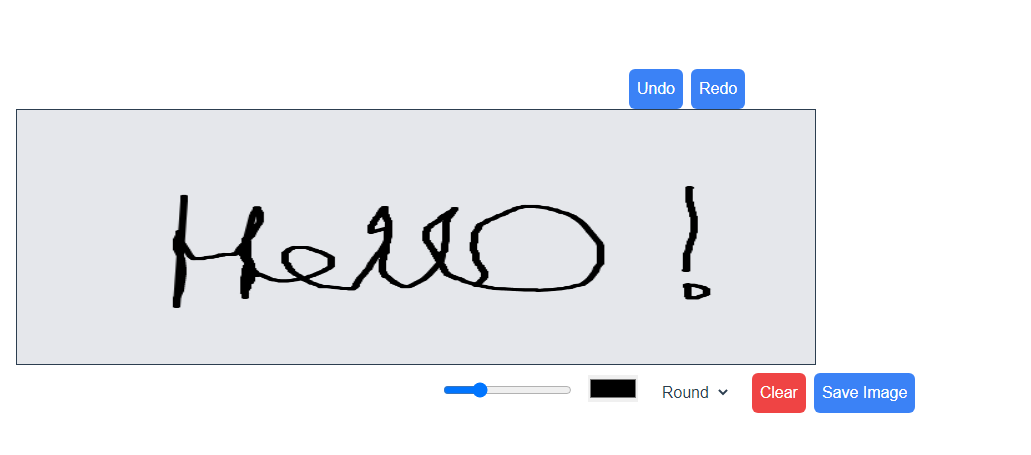
I have also added the sandbox link for you to test it!
SignaturePad.vue
So, that's it folks! With these few lines of code, we have created a fully functional drawing app that allows the user to draw on a canvas, choose different brush sizes and types, change the color of the brush, and save their drawing as an image. I hope this article was helpful and that you learned something new. Happy coding!
Related PostsView all posts
Imagine you're on a website, and you want to show... Read more
Rezaul H Reza,16 August 2023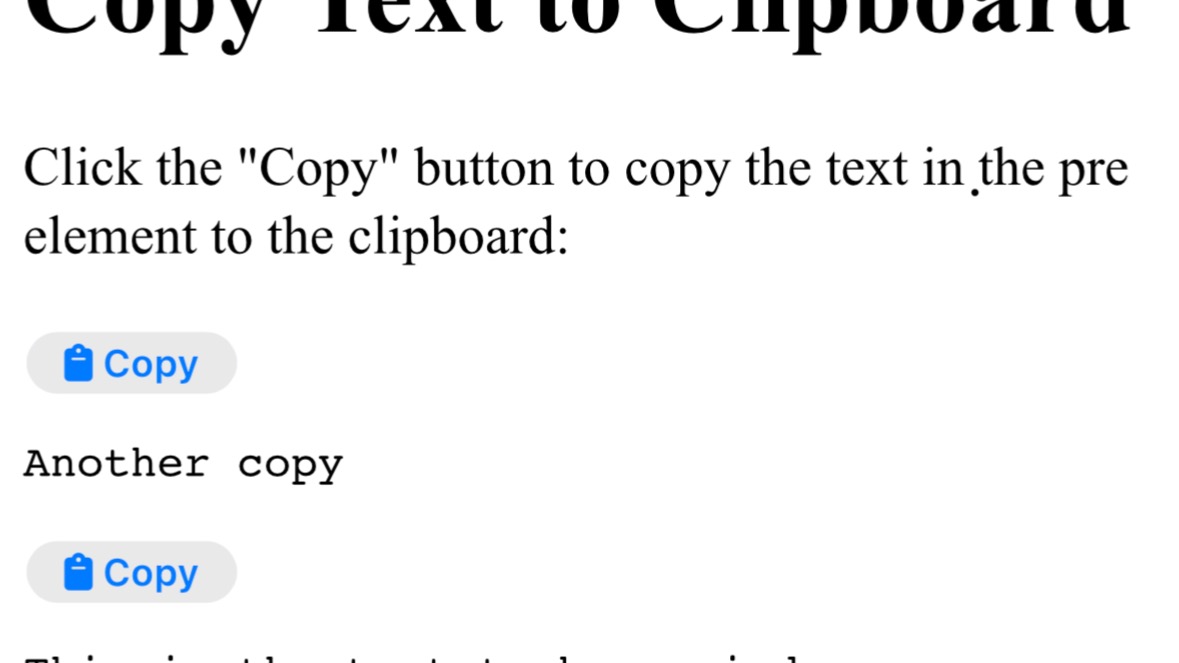
In this tutorial, we'll walk you through the steps... Read more
Rezaul H Reza,29 December 2022
"In this tutorial, we will learn how to create a C... Read more
Rezaul H Reza,27 December 2022Comments (0)